Installing to a new Project (VS2015)
- James Ellis-Jones
This subject shows how to create a new site running Lynicon in Visual Studio 2015.
Create Solution
Lynicon currently only runs on old-style ASP.Net MVC, not on ASP.Net Core. An ASP.Net Core version of the CMS is in development.
To set up an MVC 5 website, do the following:
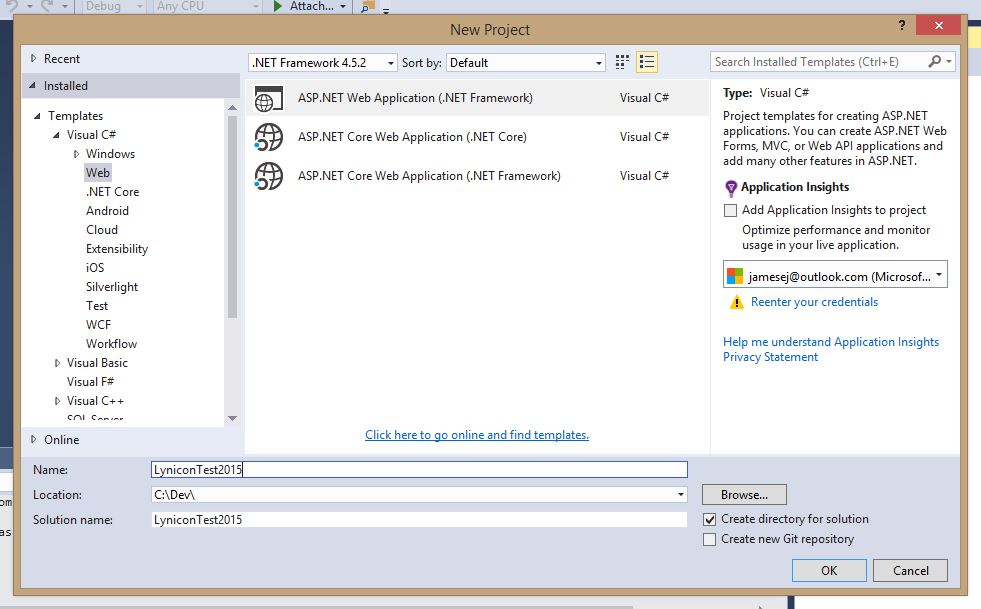
Select ASP.Net Web Application as the project type.
Do not call the new Solution or Project 'Lynicon' (or Lynicon.Base or any other such name) as it will cause assembly linking problems
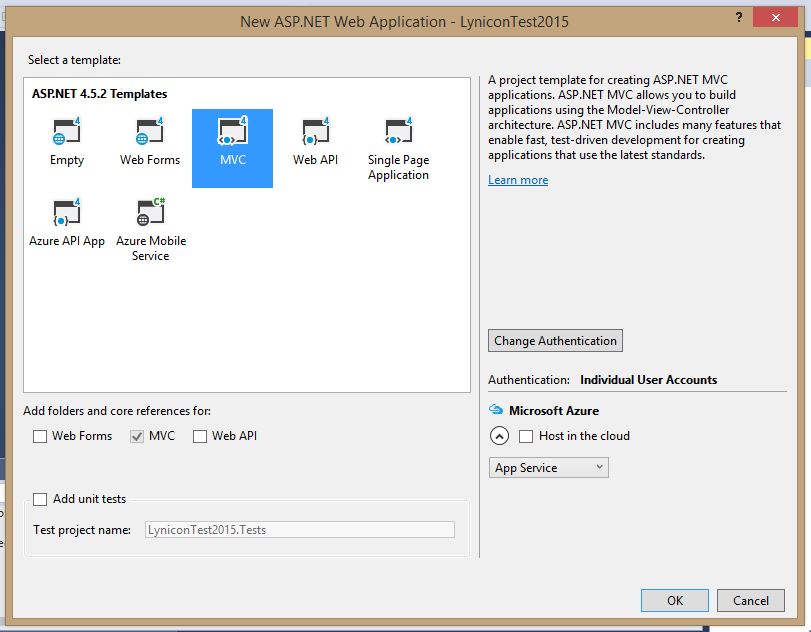
Choose the MVC template
Install Lynicon
To install Lynicon find it in the Nuget Gallery on nuget.org
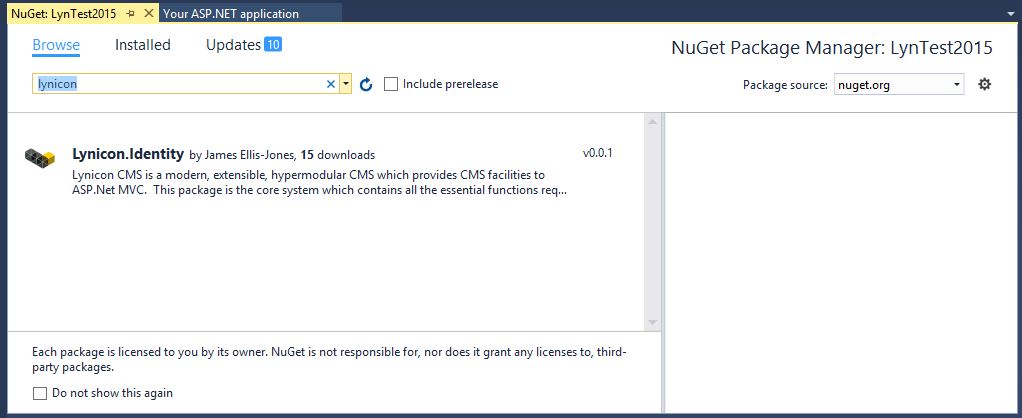
Choose Lynicon.Identity package.
Set the Connection String to the Database
Determine a SQL database locally or remote which will host the content and user data. In web.config, set the value for the connection string element which has been created by the installation, and also the DefaultConnection connection string which already existed (ensuring user tables are created in the same database as content tables):
  <connectionStrings>
    <add name="DefaultConnection" connectionString="..."  providerName="System.Data.SqlClient" />
    <!-- Add lynicon database connection string here, or delete if no database being used -->
    <add name="LyniconContent" connectionString="..." />
  </connectionStrings>
Build the Site
Run a build on the site as the commands you are about to run will load the current site's compiled code in order to enable them to execute, and they won't work without this step.
Build the Database
If you used the default connection string from the project scaffolding which points to an .mdf file in App_Data, you will need to ensure the database is created before running the initialization commands.
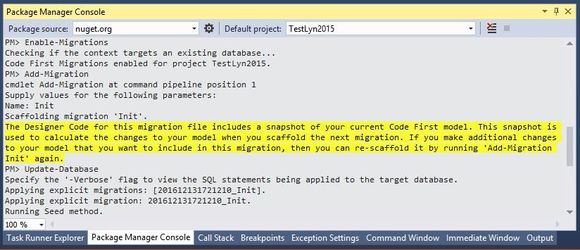
These initialize and activate Entity Framework Migrations.
- Enable-Migrations: this sets up the project for migrations
- Add-Migration -Name Init: this creates the first migration to create the database with ASP.Net Identity tables set up
- Update-Database: this runs the migration
Run the Initialization Commands
If you get an error starting: 'Initialize-LyniconProject' is not recognised as the name of a cmdlet, you probably need to upgrade your Powershell version to Version 4. Instructions can be found on the web.
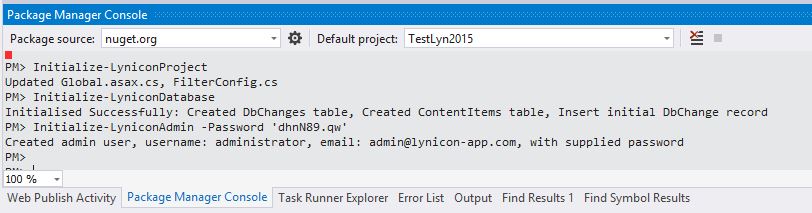
Go to the Package Manager console. Lynicon has installed Powershell commands to set up the CMS. The commands to run (in this order) are shown in the image. They are:
- Initialize-LyniconProject: this inserts commands into the Global.asax.cs to run lynicon initialization, and into FilterConfig.cs to set up Lynicon's MVC script manager
- Initialize-LyniconDatabase: this builds the core database tables needed for Lynicon
- Initialize-LyniconAdmin: this creates an admin user for Lynicon with all the admin roles, allowing you to access the CMS editor and back end. You have to supply a Password parameter ensuring that the admin password is never set to a default value. Please remember to use single quotes around the password to avoid any problems with special characters. The admin user's username is 'administrator' and the default email is 'admin@lynicon-user.com'
Ensure you only have one instance of Visual Studio running when you run these commands or they may fail.
First Run
If you now run the site and log in as the administrator you will be able to see the Lynicon pages as described in the User Manual. Lynicon is now ready to be used for CMS functions.
You have to log in via the /lynicon/login page rather than the /account/login page which is part of the startup site template, as the latter assumes that the user name is the same as the email for all users
To now set up a basic content-managed model, route and view, consult the Hello World page.