Installing to a New Project - VS2017 (.Net 4.6.1+, .Net Standard 2.0, Core 2.0)
This subject shows how to create a new site running Lynicon ASP.Net Core in Visual Studio 2017. The latest version of LyniconANC Nuget package will work with an ASP.Net Core 2.0 project.
Create Solution
Lynicon ASP.Net Core targets .Net 4.6.1+ or .Net Standard 2.0 (which works with .Net Core 2.0)
To set up an ASP.Net Core website, choose 'ASP.Net Core Web Application (.Net Core)' below for an application running on .Net Core 2.0, or 'ASP.Net Core Web Application (.Net Framework) for an application running on full .Net 4.6.1. The subsequent steps are all the same regardless of what platform you choose here.
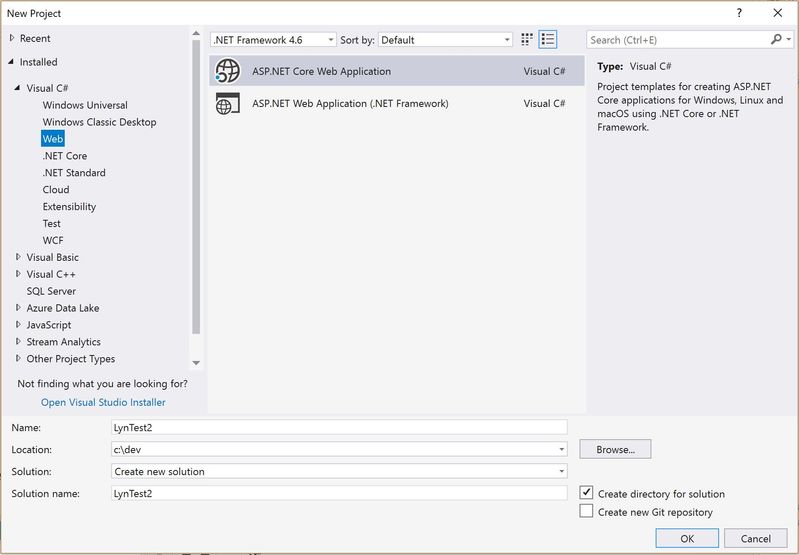
Do not call the new Solution or Project 'Lynicon' (or Lynicon.Base or any other such name) as it will cause assembly linking problems
You'll now see the following window:
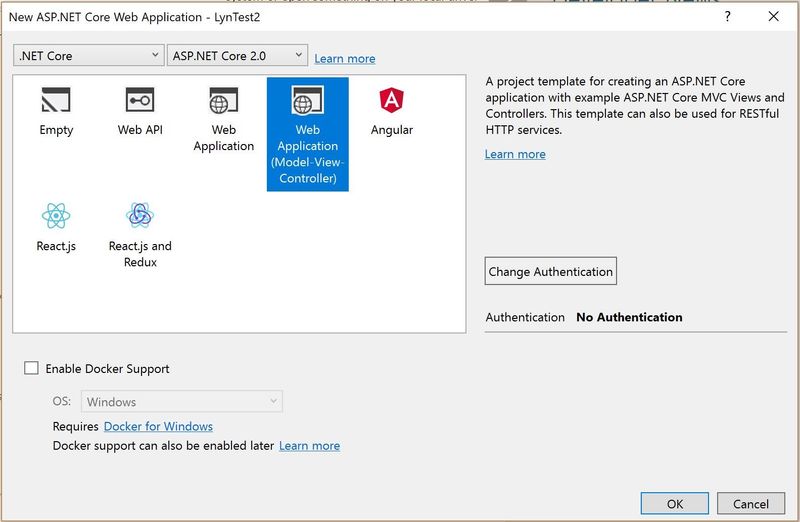
Choose the Web Application template. Ensure the Authentication choice is No Authentication as this package sets up its own ASP.Net Identity based membership system.
Install Lynicon
Now install Lynicon. Find it in the Nuget Gallery on nuget.org
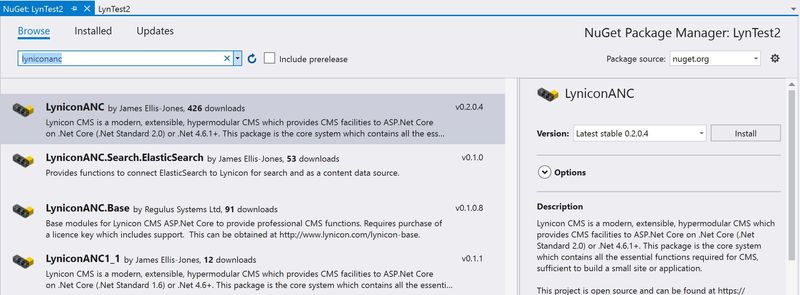
Choose the LyniconANC package.
Build the project so that Lynicon references are available.
Set up Lynicon commands
Now replace the code in Program.cs/Main() so you can will enable you to use the executable which normally runs the Kestrel webserver with your site to run Lynicon service and setup commands:
var host = BuildWebHost(args);
if (Lynicon.Commands.CommandRunner.InterceptAndRunCommands(host.Services, args))
    return;
host.Run();
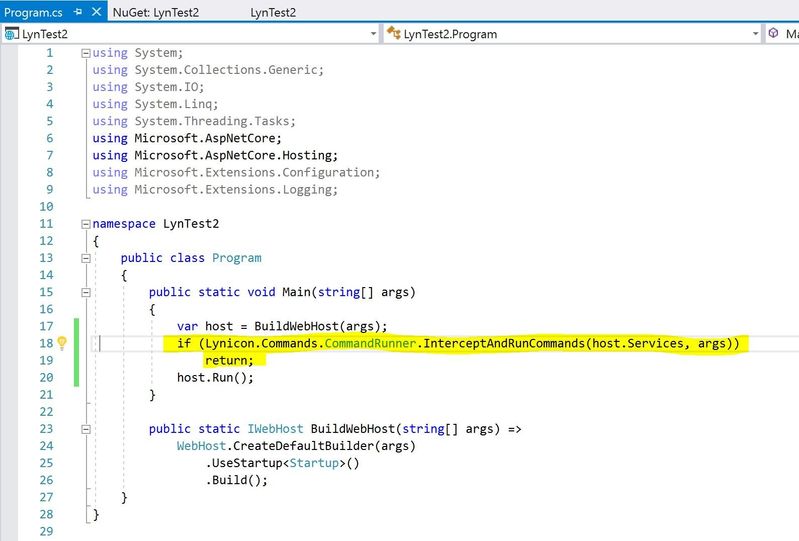
The above shows the code in context.
Now, build the project in Visual Studio.
Run Command to Initialize Project
Find the folder in which the project is found e.g. something like in this case C:\Dev\LynTest\LynTest.
Open a Visual Studio developer command window as Administrator (right click the menu item and choose Run as Administrator).
dotnet run -- --lynicon initialize-project
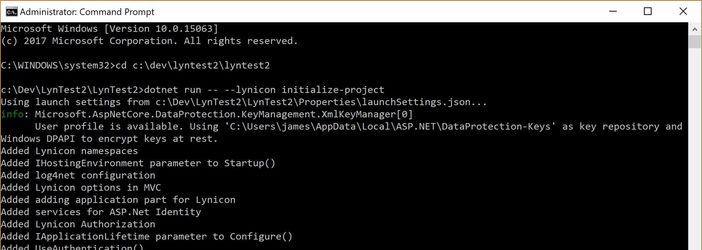
Move (cd) to this directory, and then using the dotnet CLI, run the command "dotnet run -- --lynicon initialize-project" e.g. as underlined above. First this will build your project. Then this tells your project executable to run a command to download new files and update existing ones in your project. This command makes a number of changes to the Startup.cs file. This will work with the Startup.cs file provided with the template we have used to create this project in these instructions. It should work with most customised Startup.cs files, especially if you follow standard C# formatting, but it is not guaranteed to work. You can check all its operations succeeded by inspecting its output, at the top it describes whether it succeeded in modifying files, then it lists all the files it has downloaded into your project. If you have problems, refer to the page which describes the changes you need to make to the Startup.cs file. If the command fails altogether, you can follow the steps to manually initialize the project.
Leave the command window open after this as you will need it later.
Optional: Set up Storeless Module for Non-Database Content Store
If you want to set up Lynicon to run using an in-memory store backed with a file, you can set up the Storeless module. This is in the Lynicon.Extra package and the instructions for setup and configuration are on their own page. Once you have the Nuget package installed and the configuration set up, rebuild the site and you can skip straight to Run the Initialize-Admin command below.
Set the Connection String to the Database
Determine a SQL database locally or remote which will host the content and user data. In appsettings.json, set the value for the connection string in the configuration section which has been created by the initialize-project command:

Run the Initialize-Database command
Go back to the command window.
dotnet run -- --lynicon initialize-database
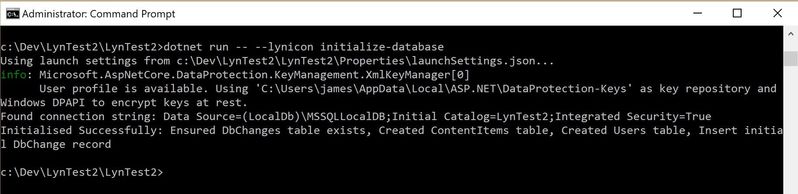
Run "dotnet run – --lynicon initialize-database". After building your project again, this will connect to the database with the connection string provided and set up the core tables Lynicon requires.
Run the Initialize-Admin Command
dotnet run -- --lynicon initialize-admin --password p4ssw0rd
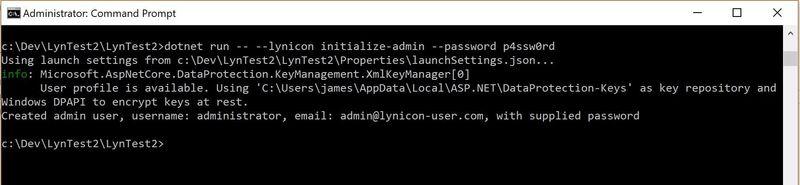
Run "dotnet run – --lynicon initialize-admin --password <admin password>" (use your own password in place of pAssw0rd!). This sets up the admin user with the supplied password. Lynicon does not create a default admin user to avoid the scenario where this user is left with their default password causing a major security risk.
Confirm the output from this command looks as in the screenshot above.
You are now ready to use Lynicon CMS.
First Run
If you now run the site and log in as the administrator on /lynicon/login you will be able to see the Lynicon pages as described in the User Manual. Lynicon is now ready to be used for CMS functions.
To now set up a basic content-managed model, route and view, consult the Hello World page.
Other Packages
You can find Lynicon.Extra, a package containing free but closed source add-ons for Lynicon (including a module allowing Lynicon to run without a database) on Nuget. Also there is LyniconANC.Base, a paid for module containing a variety of more advanced CMS features, which comes 1 year's support for all your Lynicon software.